


Have you ever stood outside during a heavy rain and thought, “All that water hitting the roof could be useful instead of just wasted down the street”? It’s a fair question.
Most homes are already set up to collect water in a way – gutters and downspouts are natural conveyance systems. The missing piece is storage.
With a few smart adjustments, you can turn your roof into a reliable source of water for gardens, landscaping, or even limited household use.
Let’s explore how roof drainage and rainwater storage can work together, what parts make up a good system, and how you can make the most of something that literally falls from the sky for free.
Quick Reference Table
Here’s a snapshot of options and their typical uses:
| Component | Options | Best Use Case |
| Storage size | 50-75 gal barrels | Gardens, small yards |
| 500-2,500 gal cisterns | Larger landscaping, partial household | |
| 5,000+ gal underground tanks | Full irrigation, commercial use | |
| Roof material | Metal, slate | Cleaner water, potable potential |
| Asphalt shingles | Garden or lawn irrigation | |
| Filtration | Mesh screen, sand/gravel | Basic garden use |
| Cartridge + UV/chemical | Potable household use | |
| Distribution | Gravity-fed hoses | Simple garden setups |
| Pump-fed sprinklers or plumbing | Large yards, indoor use |
Roof Drainage and Storage Belong Together
Every roof is a catchment surface. It sheds rain toward gutters, which move the flow into downspouts. Normally, the downspouts just send the water away from the foundation and out into the storm drains.
That’s wasted potential. By pairing roof drainage with storage, you unlock a renewable supply. For example, one inch of rain on a 1,000-square-foot roof produces about 623 gallons of water.
In a place like Pennsylvania, where annual rainfall hovers near 40 inches, that’s more than 24,000 gallons per year. Of course, you won’t capture every drop – losses from debris, evaporation, and overflow are real, but two-thirds of that total is often usable.
In semi-arid regions, like southern Arizona, storing roof runoff isn’t just a nice-to-have. It’s often a necessity.
Tucson even requires some commercial properties to cover half of their irrigation needs with harvested rainwater. That tells you how practical and powerful these systems can be.
The Building Blocks of an Integrated System
A good rainwater harvesting setup doesn’t need to be complicated, but it does require thoughtful design. The main elements include:
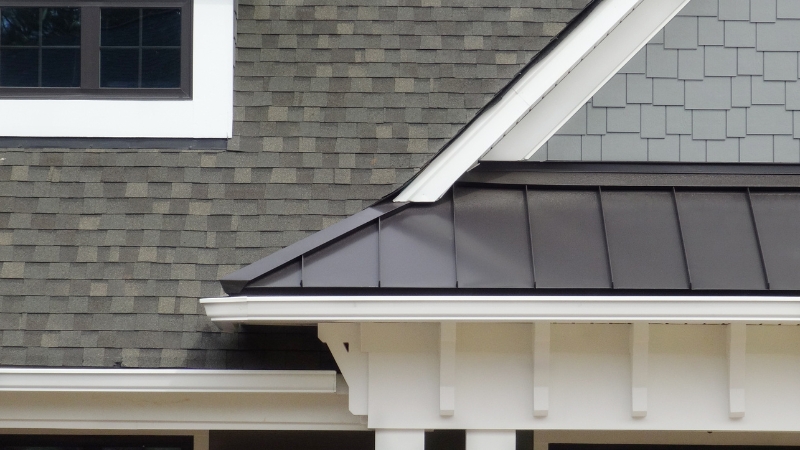
Roof Catchment
Your roof is the first point of contact. Smooth materials like metal or slate shed cleaner water with fewer losses. Asphalt shingles are more common but better suited for non-drinking purposes due to potential leaching.
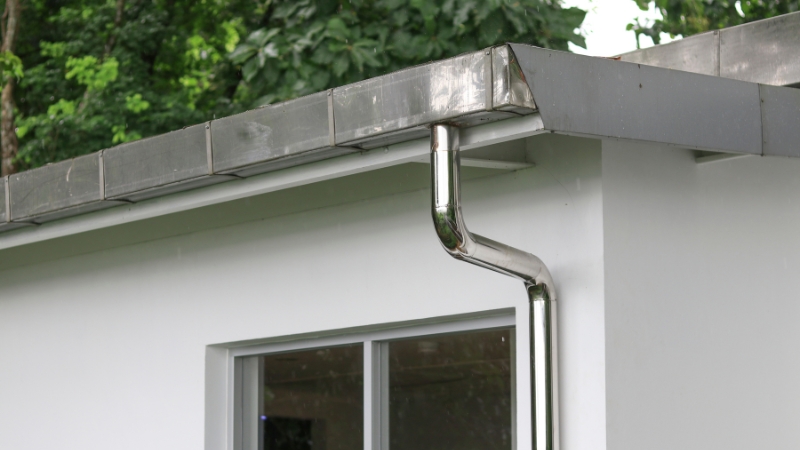
Gutters and Downspouts
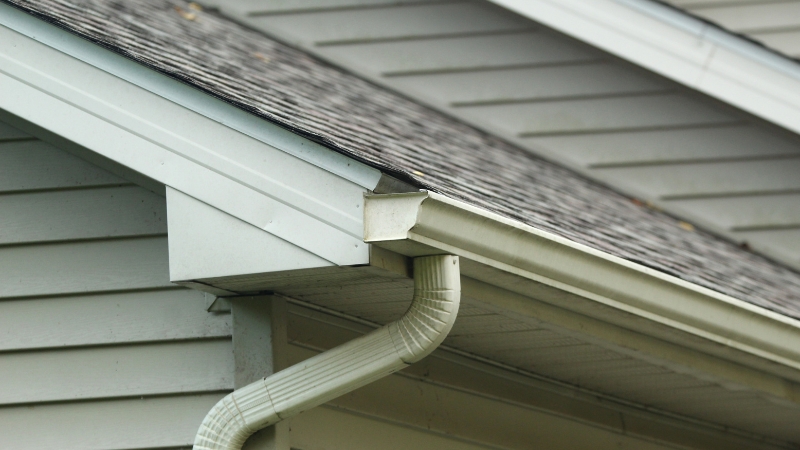
Think of gutters as your collection lanes. To prevent overflows, they should be properly sized. A general rule is at least one square inch of downspout cross-sectional area per 100 square feet of roof.
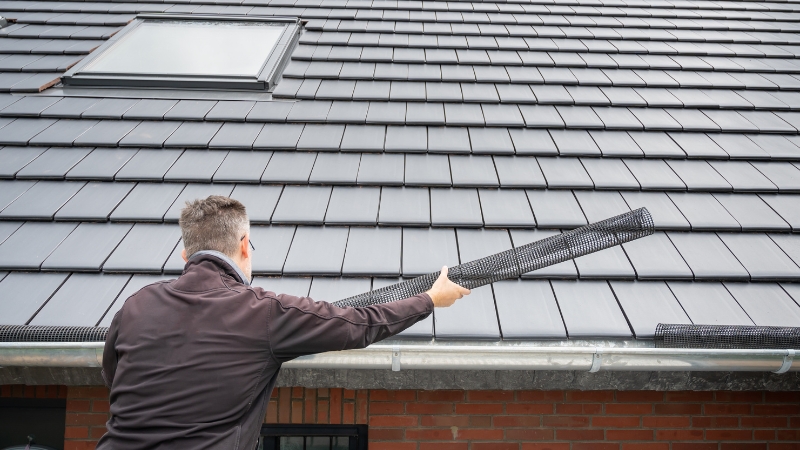
That ensures heavy storms don’t overwhelm the system. Leaf guards or mesh screens are also worth mentioning. Without them, debris builds up and can clog the downspouts or storage pipes.
A simple filter at this stage saves endless maintenance later.
First-Flush Diverters
The first gallons of a storm usually carry dust, pollen, bird droppings, and other contaminants. A diverter discards that initial runoff before it enters your tank. Roughly 10 gallons per 1,000 square feet of roof is a common cutoff.
Filters
Once past the diverter, water should flow through the filters. These might be as simple as a sand-and-gravel layer or as advanced as cartridge sediment filters.
Filtration protects both the storage tank and whatever equipment you connect afterward.
Storage Tanks
View this post on Instagram
Rain barrels are popular starting points. They hold 50-75 gallons and can easily connect to garden hoses. For bigger needs, cisterns scale into the thousands of gallons.
They can be above ground, underground, concrete, plastic, or fiberglass. What matters most is durability, safety of materials, and an overflow system that directs excess water somewhere useful, like a rain garden.
Distribution
Once you’ve stored water, you’ll want to move it where it’s needed. If your tank is elevated, gravity may be enough.
Otherwise, small pumps provide pressure for sprinklers, drip irrigation, or even indoor plumbing applications like toilet flushing.
Materials That Make a Difference
The quality of your system depends heavily on the materials you choose.
- Roofs: Metal or slate surfaces are best for cleaner runoff. Clay tiles and asphalt shingles can leach compounds, making them better suited for outdoor irrigation.
- Gutters and Downspouts: Seamless aluminum or PVC are reliable, corrosion-resistant options. Avoid older materials with lead solder.
- Tanks: Opaque tanks help prevent algae growth. Dark-colored plastics, concrete, or buried cisterns work well. Fiberglass offers longevity, while galvanized steel often comes with protective liners.
Costs vary. Fiberglass can run anywhere from $0.50 to $2 per gallon of capacity, while concrete is often cheaper for large volumes but requires significant space and support.
Calculating How Much Water You Can Capture
Here’s a straightforward formula: 1 inch of rain on 1,000 square feet of roof = 623 gallons. But not all of it is usable. With efficiency losses factored in, you might capture 75 to 90 percent of that total. Let’s run a practical example:
That’s enough to cover a large garden or supplement household non-potable use. If you want to estimate for a household, average daily water needs are about 50 gallons per person.
For a family of four, that’s 73,000 gallons annually. So while a 2,000-square-foot roof won’t fully cover all household water, it can still offset a significant portion.
Smart Design and Placement Choices

Where you locate storage tanks and how you size them is just as important as the tanks themselves.
- Underground tanks: Keep water cool and prevent freezing. They also save yard space but cost more to install.
- Above-ground tanks: Easier to install and maintain, but exposed to sunlight and temperature swings.
- Safety setbacks: Storage should be at least 50 feet from septic systems or other potential contamination sources.
Another often overlooked part: ventilation. Tanks need screened vents to allow air in while keeping insects out. Overflow outlets should match the inflow capacity to handle heavy rains.
Green Roofs and Hybrid Systems
There’s a growing movement to pair green roofs with rainwater storage. Green roofs are layers of vegetation and soil installed on top of conventional roofing. They absorb some rainfall, reduce runoff volume, and cool buildings in hot weather.
When combined with rainwater harvesting, the synergy is powerful. Studies in Europe found small tanks paired with green roofs reduced runoff by up to 65 percent, compared with 50 percent from standard roofs.
Extensive green roofs (with shallow soil and lighter plants) are great for reducing runoff, while intensive versions (with thicker soil and larger plants) provide greater ecological benefits. The trade-off is that green roofs can produce more sediment or organic runoff, which means filtration systems need to be a bit more robust.
Best Practices for Installation
Setting up a system right from the start prevents headaches down the road.
- Roof preparation: Clean before installation, check the slope, and repair leaks.
- Gutter installation: Maintain a slight slope – about 1/16 inch per foot – to keep water flowing properly. Add gutter hangers every three feet for stability.
- Tank placement: Provide a stable foundation, often concrete or compacted gravel, especially for larger cisterns. Remember that water weighs about 8 pounds per gallon, so even a modest 500-gallon tank will weigh over 4,000 pounds when full.
- Piping: Use labeled, color-coded pipes for non-potable water to avoid accidental connections. Purple is the standard color in the U.S. for reclaimed or non-potable water lines.
And always check local codes. Some cities require permits or backflow prevention devices when connecting rainwater systems to household plumbing.
Maintenance and Seasonal Care
No system is truly “set it and forget it.” Rainwater harvesting works best with steady upkeep.
- Gutters: Clean seasonally, especially in spring and fall. In wetter regions like Australia, many households schedule professional visits from Gutter Cleaning Specialists to avoid costly blockages.
- Leaf screens: Check weekly during leaf fall.
- First-flush diverters: Empty and reset monthly.
- Storage tanks: Inspect for leaks, algae, or sediment buildup at least twice a year.
For algae prevention in non-opaque tanks, you can add a small amount of bleach – about one ounce per 500 gallons. For potable water, additional disinfection is needed, such as UV treatment or chlorination. Periodic water quality tests are essential if you plan to drink harvested rainwater. In colder climates, drain rain barrels before winter to avoid cracking from ice expansion.
Real-World Benefits
@user3293375811759177 COMPLETE Rainwater System START TO FINISH // Part 2 #rainwater #rainwatercollecting #genius #incredible #rainwaterharvesting #dyi #watercatchment #waterfilter #rain #rainfa #environment #savewater #roof #downspout #gutter #roofing #saveearth #viral #fyp #fypシ #trending ♬ original sound – user3293375811759177 – user32933758117591779
So, what’s the payoff? Beyond cutting water bills, rainwater storage systems contribute to environmental sustainability in several ways:
- Water savings: Large commercial systems in places like Seattle save over a million gallons per year.
- Erosion control: Capturing runoff reduces stormwater surges that erode soil and overwhelm drainage systems.
- Energy reduction: Pumping and treating municipal water is energy-intensive. Rainwater harvesting in the U.S. could save hundreds of billions of kilowatt-hours annually.
- Carbon footprint: Each million gallons of harvested rainwater saves 1 to 1.5 tons of CO₂ emissions.
Even at a residential scale, the benefits are meaningful. A few rain barrels can keep a garden thriving all summer without touching the hose, while a large cistern can provide months of household irrigation.
Final Thoughts
The idea is simple: your roof already collects water – why not store it for later? By combining roof drainage with storage, you’re essentially building a personal water reserve that helps your plants, lowers utility bills, and eases pressure on city systems.
Whether you start with a single rain barrel tucked under a downspout or a buried cistern feeding your irrigation system, the steps you take today can make your household more sustainable tomorrow.
So the next time you hear rain hammering on your roof, think about how many gallons are slipping away – and what you might do to put them to better use.